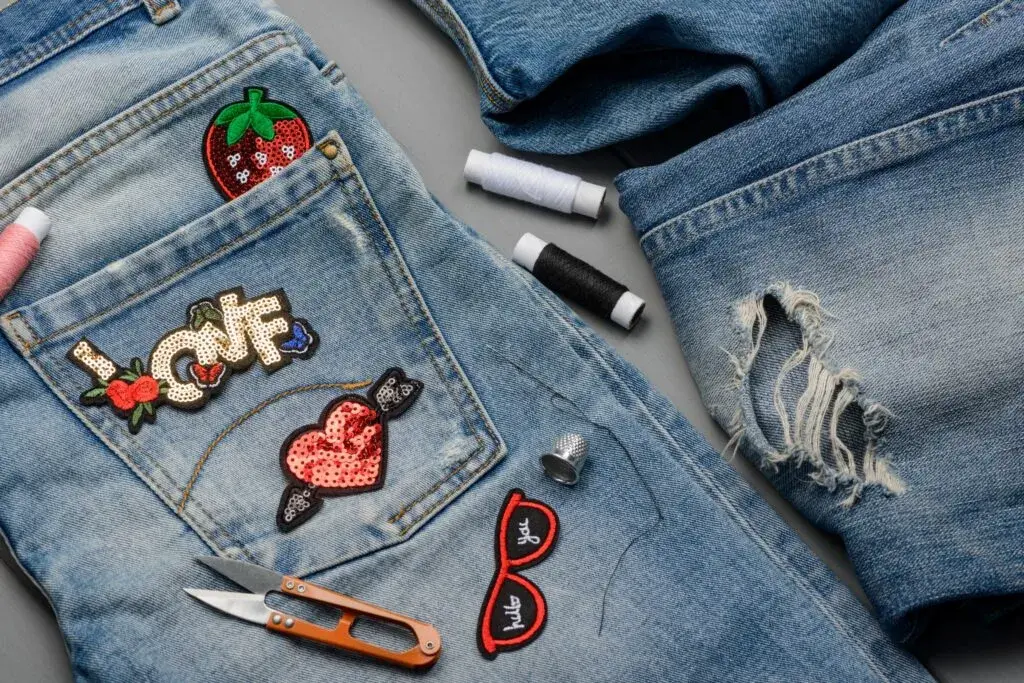
9 Easy Ways to Attach Embroidered Patches on Clothes
Embroidered patches are a fun and creative way to add personality to your wardrobe while showcasing your unique style. They’re also an effective tool for promoting businesses, organizations, or causes. From jackets and jeans to backpacks and hats, patches can make a bold statement anywhere.
In this guide, we’ll explore nine easy methods to attach embroidered patches, so you can choose the one that works best for your project.

What to Consider Before Attaching a Patch
Not all patches are created equal, and selecting the right attachment method depends on your patch and fabric. To ensure your embroidery projects turn out perfectly, consider these important factors before attaching a patch:
- Patch Material (What material is the patch?): What Most patches are made of fabrics like nylon, polyester, cotton, or denim. The type of material will influence how you attach it and the fabric it’s best suited for.
- Placement (Where to place the patch?): Popular areas include the chest, shoulders, back, or even pockets. Think about where your patch will stand out most.
- Design and Size (What’s the design?): Choose patches that are eye-catching and complement your garment. Small or medium-sized designs with bold colors often make the best impression.
- Customization (When to opt for a custom patch?): If off-the-shelf patches don’t convey the right message, consider designing your own custom patch.
Kickstart your designs with AI
Leverage the power of AI to streamline your design process,
turning your ideas into polished, production-ready products with ease.
How to Attach Embroidered Patches: 9 Easy Methods
The best method for attaching patches often depends on the resources you have and the type of fabric you're working with. Let’s explore each option in detail, so you can choose the one that works perfectly for your project.
1. Iron-On Patches
Attaching an embroidered patch using an iron is one of the quickest and easiest methods available. Iron-on patches come with a heat-activated adhesive backing that bonds to your fabric when exposed to high temperatures. Some may include a protective backing sheet that you'll need to remove before application.
Best Fabrics for Iron-On Patches
Iron-on patches work best on sturdy materials like denim or cotton. These fabrics can handle the heat and pressure required to create a strong bond. Avoid using this method on delicate fabrics such as silk or polyester, as they may burn or discolor under high heat.
Step-by-Step Instructions for Ironing on Patches
- Prepare Your Garment: Lay your fabric on a flat, heat-resistant surface, like an ironing board, and ensure it is wrinkle-free.
- Position Your Patch: Place the adhesive side of the patch on the desired spot. Double-check the placement, as the bond is permanent once applied.
- Protect Your Fabric: Cover the patch and surrounding fabric with a thin towel to shield them from direct heat.
- Set Your Iron: Preheat your iron to 350°F, ensuring the steam function is turned off.
- Preheat the Fabric: Press the iron onto the area where the patch will go for about 20 seconds to warm the fabric and prepare it for bonding.
- Attach the Patch: Press the iron over the towel-covered patch using slow, circular motions for about one minute. Check to ensure the patch is securely attached, with no loose edges. If necessary, repeat the process for another minute.
- Cool and Inspect: Allow the garment to cool completely. Once at room temperature, inspect the patch to confirm it’s firmly adhered..
Fabric Glue or Fusible Web
If you’re looking for a quick and easy way to attach your embroidered patches, gluing can be an option. However, it’s best used as a temporary fix or a last resort, as glue may not provide the same durability as other methods like sewing or ironing.
When to Choose Glue for Attaching Patches
Gluing works well for lightweight projects or when you’re short on time, but it depends on the type of glue you use. Fabric glue or fusible webbing is suitable for casual use but may not hold up over long periods, especially with frequent washing or heavy wear.
Step-by-Step Guide to Attaching Patches with Glue
- Choose the Right Glue: Use high-quality fabric glue designed specifically for textiles. Avoid all-purpose glues, as they may damage your garment or fail to adhere properly.
- Prepare Your Materials: Ensure your patch and garment are clean and dry. This helps the glue bond more effectively.
- Apply the Glue: Carefully spread an even layer of glue on the back of your patch. Be sure to cover the edges for a secure hold.
- Press and Hold: Place the patch on your desired spot and press it firmly against the fabric. Hold it in place for about 30 seconds to allow the glue to set.
- Let It Dry: Allow the glue to dry for at least one hour. For the best results, let it cure for a full 24 hours before wearing or washing the garment.
3. Velcro
Want an easy and practical way to customize your clothing or accessories? Velcro patches are a fantastic option for anyone seeking versatility and style. The best part? You can swap your patches in and out effortlessly, giving your items a fresh look whenever you please. Velcro allows you to mix and match your embroidered patches without committing to permanent placement. It’s especially useful for uniforms, accessories, and items that require frequent updates or adjustments.
When to Choose Velcro for Attaching Patches
Velcro is perfect for projects where flexibility and reusability are key. It’s a great option for:
- Uniforms: Easily swap patches to reflect roles or ranks.
- Accessories: Update backpacks, jackets, or hats with different designs as often as you like.
- Temporary Use: Attach patches temporarily for events or promotions without altering your garment permanently.
Step-by-Step Guide to Attaching Patches with Velcro
- Choose the Right Velcro: Select Velcro strips or patches designed for fabric use. Adhesive-backed Velcro is suitable for some projects, but sewing Velcro offers better durability.
- Prepare Your Materials: Ensure your patch and garment are clean and dry to achieve a secure attachment.
- Attach the Velcro to the Patch:
- Adhesive Option: Peel off the backing and stick the Velcro onto the back of your patch.Sewing Option: Stitch the Velcro onto the patch, ensuring all edges are firmly secured.
- Attach the Velcro to the Fabric:
For adhesive Velcro, press it firmly onto the garment in your desired location.
For sewing Velcro, stitch it securely onto the fabric to keep it in place.
Match and Attach: Align the Velcro on your patch with the Velcro on your garment and press them together firmly.
4. Fabric Adhesive: A Hassle-Free Way to Attach Embroidered Patches
Looking for a quick and permanent method to secure your lightweight embroidered patches? Fabric adhesive offers a simple, no-sew solution—perfect for delicate materials or synthetic fabrics that don’t work well with heat application.
Unlike traditional glue, fabric adhesive creates a strong, lasting bond. It’s an excellent option for projects where using a heat press or iron isn’t feasible.
How to Attach Patches with Fabric Adhesive
- Apply the Adhesive: Spread an even layer of adhesive on the back of your patch.Be sure to cover the edges for a strong hold.
- Attach the Patch: Press the patch firmly onto your desired location. Make sure it’s aligned properly before the adhesive sets.
- Let It Dry: Allow the adhesive to cure overnight—about 24 hours is ideal—before wearing or washing your garment.
5. Glue Gun
Using a glue gun is an efficient and versatile method for attaching embroidered patches, offering stronger adhesion than standard glue. With the right glue gun and a little care, you can create a secure bond that works well on various fabrics and surfaces.
Choosing the Right Glue Gun
There are three main types of glue guns:
- Standard-Temperature Glue Guns: Operate at around 380°F and are better suited for heavier materials but can damage delicate fabrics.
- Low-Temperature Glue Guns: Operate at approximately 260°F, making them ideal for lighter fabrics and more sensitive materials.
- Adjustable-Temperature Glue Guns: Allow you to customize the temperature, providing flexibility for different projects.
For most patch applications, we recommend using a low-temperature or adjustable-temperature glue gun. These options minimize the risk of burning through delicate fabrics. Always test the glue on a small area of your fabric to ensure it won’t cause damage or discoloration.
Step-by-Step Guide to Using a Glue Gun for Patches
- Prepare Your Materials: Make sure your patch and garment are clean and dry. This ensures proper adhesion.
- Heat the Glue Gun: Plug in your glue gun and allow it to heat to the appropriate temperature for your fabric.
- Apply the Glue: Carefully spread a thin, even layer of glue onto the back of your patch. Pay special attention to the edges for a secure hold.
- Press the Patch in Place: Position the patch where you want it on your garment. Press it down firmly for about 20 seconds to help the glue bond to the fabric.
- Check the Adhesion: Wait a few minutes, then inspect the edges to ensure the patch has adhered properly. If needed, apply a small amount of glue to any loose edges and press again.
6. Double-Sided Tape
Double-sided tape is a convenient, hassle-free option for attaching embroidered patches—perfect for quick fixes or temporary designs. Its versatility allows you to cut the tape to match any patch shape or size, making it a flexible and beginner-friendly solution.
Why Choose Double-Sided Tape?
- Customizable Fit: Easily trim the tape to match the exact size and shape of your patch.
- Safe and Non-Toxic: Ideal for delicate fabrics and garments, ensuring no damage to your clothing..
- Machine Washable: Though not as durable as other methods, some high-quality double-sided tapes can withstand light washing.
How to Use Double-Sided Tape for Patches
- Prepare Your Materials: Ensure your garment and patch are clean and dry to promote better adhesion.
- Stick the Tape to Your Patch: Apply the tape to the back of your patch, pressing firmly to ensure it adheres evenly.
- Attach to the Fabric: Position the patch on your garment and press it firmly onto the surface. Smooth out any wrinkles or bubbles.
Important Considerations
- Temporary Solution: While double-sided tape is convenient, it’s not as long-lasting as methods like sewing, iron-ons, or glue.
- Gentle Care: Avoid heavy washing or rough handling to prolong the life of your attached patch.
7. Hair Straightener
Did you know your trusty hair straightener can double as a tool for attaching embroidered patches? It’s a convenient alternative to using a heat press or iron, and it works perfectly to adhere patches securely to fabric with minimal effort.
Why Use a Hair Straightener?
- Accessible and Convenient: Ideal if you don’t have access to a heat press or iron.
- Precise Application: The smaller surface area allows for targeted heat, reducing the risk of scorching your fabric.
- Quick and Effective: Achieve a firm bond in seconds.
Step-by-Step Guide to Using a Hair Straightener
- Gather Your Supplies: You’ll need your patch, garment, a towel, and a hair straightener. Make sure your patch has a heat-activated adhesive backing for this method to work.
- Prepare Your Workspace: Lay the garment on a flat, smooth surface. Place the patch in your desired position with the adhesive side facing down. Cover the patch with a thin towel to protect it and the fabric.
- Heat the Hair Straightener: Set the straightener to around 100 degrees (or a low-heat setting). This prevents overheating, which can damage your patch or fabric.
- Apply Heat: Press the hair straightener firmly onto the towel-covered patch for about 10 seconds. Move it gently to ensure even heat distribution.
- Cool and Check: Allow the patch to cool for two minutes before removing the towel. Check that the patch has adhered properly. If needed, repeat the process to secure the edges.
- Final Steps: Let the patch set for 24 hours before washing. When cleaning, use cold water and mild detergent to preserve the bond.
8. Hand Sewing
Hand-sewing is one of the most durable and timeless methods for attaching embroidered patches to your clothing. If you’re looking for a long-lasting solution and don’t mind a bit of DIY effort, this is the perfect option. Plus, it’s portable and requires only a few basic tools—making it ideal for on-the-go repairs or creative projects.
Why Choose Hand Sewing for Your Patches?
- Maximum Durability: A securely hand-sewn patch can outlast many other attachment methods.
- Travel-Friendly: Compact and simple tools like needles and thread are easy to carry.
- No Heat Required: Great for delicate fabrics or patches without iron-on backing.
Step-by-Step Guide to Hand Sewing Your Patch
- Position Your Patch: Use straight pins to secure the patch exactly where you want it on your garment. This ensures it stays in place while you sew.
- Select the Right Thread: Opt for a thin, waxed thread for added strength. Match the thread color to the edges of your patch to maintain a polished look.
- Start from the Inside: Begin threading your needle from the inside of the garment to keep stitches hidden. This gives a cleaner and more professional appearance.
- Sew Around the Edges: Pass the needle through the patch and back into the fabric, securing the edges with small, consistent stitches. Work your way around until you’ve stitched the entire perimeter.
- Tie Off Securely: Once you’ve finished stitching, tie the thread into a tight knot on the inside of the garment. Trim any excess thread for a neat finish.
9. Machine Sewing: Fast and Durable for Multiple Patches
If you’re looking for efficiency, especially when attaching multiple patches, machine sewing is your best bet. With the right setup, you can achieve professional-quality results in no time.
Why Choose Machine Sewing for Your Patches?
- Provides a long-lasting, secure attachment.
- Perfect for thick or heavy-duty patches and fabrics.
- Ideal for bulk projects or when precision is a priority.
Step-by-Step Guide to Machine Sewing Patches
- Position the Patch: Use pins to secure your patch in the exact spot you want it. Common placements include jacket sleeves or just below the shoulder.
- Select Your Thread and Needle: Match the thread color to your patch’s edges for a clean, seamless look. For thicker patches, use a sturdy needle and thread to avoid breakage.
- Set Up Your Sewing Machine: Lay the garment flat and position it under the sewing machine. Align the patch carefully to ensure precise stitching.
- Start Sewing: Stitch around the patch’s edges, working slowly to maintain accuracy. Reposition the garment as needed to ensure smooth stitching.
- Secure the Finish: Once you’ve completed the circle, tie off the thread and trim any excess. Check for loose edges or missed spots, and re-sew if necessary.
Create Custom Patches with THE/STUDIO
Embroidered patches are making a big comeback in the world of fashion, and now is the perfect time to create your custom designs. Whether you’re personalizing clothing, representing a club, or promoting your brand, THE/STUDIO makes it easy to design and order high-quality patches.
Start your journey to unique, stylish, and professional patches today. Submit your design to THE/STUDIO, and let us bring your vision to life!