9 Tips to Design Your Own Patch to Perfection
If you're considering custom patches for your product lineup or merch store, you're making an excellent choice! Custom patches are a trendy, versatile accessory that can be used on clothing, bags, hats, and more to add a unique touch of fun and flair.
Designing your own custom patch is a fantastic way to stand out and make your brand shine. Not only are patches stylish and practical, but they offer endless creative possibilities. Whether you're designing for personal use or as part of your product range, the possibilities are limitless.
In this guide, we’ll explore why custom patches are a must-have for your collection and share our top 9 tips to help you create the perfect patch design that resonates with your audience.

Why Design Your Own Custom Patch?
Custom patches have a rich history dating back to the early 1800s, and they’ve remained a timeless accessory ever since. From bikers to sports enthusiasts and alternative fashion lovers, patch fans span all ages and cultures. For sellers, designing custom patches is not only a fun way to showcase your creativity but also an excellent way to create merchandise or promotional items for your brand.
Here are just a few reasons why designing your own custom patch is a brilliant idea:
- Affordable: Patches are a budget-friendly way to add unique designs or branding to your products without breaking the bank on manufacturing costs.
- Fully Customizable: With complete creative control, you can craft a truly one-of-a-kind product that stands out from the crowd. Unlike basic printed t-shirts, custom patches allow for intricate, personalized designs.
- Effective Marketing Tool: Custom patches are a fun and eye-catching way to promote your brand or business. They can be easily attached to clothing, bags, hats, and more, offering increased visibility for your brand. Plus, your customers will love showing off their unique patches.
- Lightweight and Easy to Ship: Unlike many other accessories, custom patches are lightweight, making them affordable to ship and deliver. This convenience benefits both sellers and buyers, keeping costs low while ensuring easy distribution.
Kickstart your designs with AI
Leverage the power of AI to streamline your design process,
turning your ideas into polished, production-ready products with ease.
Top Tips for Creating the Perfect Custom Patch Design
Ready to start designing your own custom patch? Follow these nine tips to create a design that’s eye-catching and functional.
1. Consider Different Backing Options
The backing of your custom patches for clothingis just as important as the design itself. It’s crucial to consider how your patch will be used and who your target audience is. Will it be attached to clothing, bags, or other items? Will it need to be removable or permanent? At THE/STUDIO, we offer 18 different backing options, ensuring you can find the perfect fit for your design. Here are a few popular choices:
- Iron-On Backing: Iron-on backing is simple and convenient. With heat-activated adhesive, customers can easily attach your patch to their clothing or fabric items. It’s perfect for quick, permanent placement.
- Velcro Hook Backing: Velcro hook backing allows users to easily attach and remove patches as they wish. This is ideal for designs that might need repositioning, such as military or tactical patches. It’s a great option for those who like flexibility.
- Adhesive Backing: With adhesive backing, your patch comes with a sticky layer, allowing it to be attached temporarily to surfaces like laptops, notebooks, or walls. This is perfect for promotional patches that don’t need to be permanent.
- Thin Plastic Backing: Thin plastic backing keeps your patches stable without adding bulk. It’s a great option for patches that need to maintain a slim profile. You can either sew it onto clothing or use adhesive for easy attachment.
- Magnetic Backing: Magnetic backing uses magnets on the back of your patch, allowing it to be easily repositioned without the need for adhesive. This is a popular choice for decorative patches on items like refrigerators, metal boards, or office spaces.

2. Spend Time Mocking Up Your Design
Creating a mock-up is a crucial step in the design process. It allows you to see how different colors, shapes, and elements will come together in your final patch design. Don’t rush this step—take the time to experiment with various options until you’re fully satisfied with the result.
You can use online mock-up tools or even create a physical version using materials like paper and markers. This hands-on approach helps you visualize your design more clearly and make any necessary adjustments before placing your order for custom patches online.. Getting feedback from friends, colleagues, or fellow designers can also be incredibly valuable. They may notice details you might have missed or offer suggestions that improve the overall design.
Providing a clear and detailed mock-up to your patch manufacturer is essential. This includes specifying the size, colors, element placement, and any other details you want in your final product. A well-prepared mock-up makes it easier for the manufacturer to bring your vision to life.
For a polished and professional touch, you can use design software like Adobe Illustrator or Canva to create a digital mock-up. These tools make it easy to adjust your design and share it directly with your manufacturer.
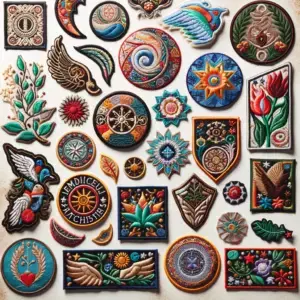
3. Take Inspiration from Everywhere
When designing your own custom patch, the possibilities are endless! Inspiration can come from almost anywhere—whether it’s current fashion trends, pop culture references, personal hobbies, or anything else that sparks creativity. You can also explore existing patches online to gather ideas and see what design elements work well.
Here are a few places to find design inspiration:
- Pinterest: An excellent platform for discovering creative ideas. You can create themed boards, explore different styles, and save images that inspire you.
- Instagram: Another fantastic resource. Follow artists, designers, and influencers who regularly share their creative process and unique patch designs.
- Browse other patch creators’ work to see how they approach design, and consider incorporating new techniques or elements into your own patch.
Think about your target audience—who will be wearing or buying your patch? Would you personally wear it? If not, it might be time to rethink the design to make sure it resonates with your customers.
4. Keep the Design Simple
Simplicity is key, especially when it comes to custom embroidered patches. The more intricate and detailed your design, the harder it becomes to accurately recreate it through embroidery. Complex designs often involve tiny details, multiple colors, and intricate patterns, which can be challenging for embroidery machines to handle.
While embroidery machines are highly precise, capturing every small detail can be difficult. Choosing a clear, bold design not only looks great but also ensures that your custom embroidered patches are produced accurately and efficiently by the manufacturer.
That said, if you're set on a more detailed design, don’t worry! There are alternative patch types, like printed or woven patches, that can handle intricate details much better. Printed patches use advanced printing techniques to reproduce complex artwork, photorealistic images, and gradients, making them ideal for designs with many colors. Woven patches use woven threads to create fine details, making them perfect for small text and intricate patterns.
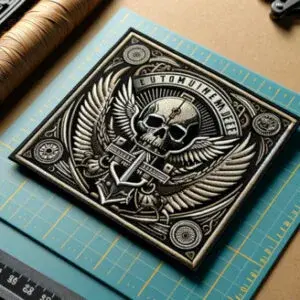
5. Don’t Forget the Edges and Borders
The edging of your patch may seem like a small detail, but it plays a significant role in the overall look and feel of your custom design. Choosing the right border can elevate your patch, so take time to consider the best option for your style!
Here are a few popular border choices to consider:
- Embroidered Border: This classic option adds a clean, professional finish to your patch. It involves sewing thread around the edges, creating a raised border that adds depth and dimension to the design.
- Merrowed Border: Using a special machine, a merrowed border stitches and wraps thread around the edge of the patch, creating a smooth, rounded finish. This option is great for more intricate designs, giving them a polished and finished appearance.
- Frayed Edges: For a unique, edgy look, you can choose frayed edges. This technique removes some threads along the border, creating a rough, textured edge that adds character and a touch of individuality to your patch.
- No Border: If you prefer a clean, minimalist aesthetic, consider leaving the border off entirely. This works particularly well for modern or geometric designs, giving them a sleek, contemporary feel.
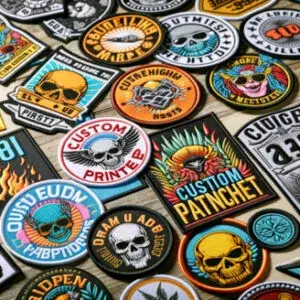
6. Consider Different Patch Types
While custom embroidered patches are a classic and popular choice, they are far from the only option available. Depending on your target audience and the intended use of your patch, it's important to explore all the different patch styles before finalizing your design. Each patch type offers unique benefits and can complement different styles and needs.
Here are a few patch types to consider:
- Woven Patches: Made by weaving threads together to create the design. They have a smooth, flat texture and can capture intricate details, making them perfect for small text or highly detailed artwork. Woven patches are also highly durable, ensuring that your design lasts over time.
- Printed Patches: Printed patches are created using high-quality printing techniques, allowing for vibrant, detailed designs with a wide range of colors. These patches are ideal for reproducing complex images, photographs, or intricate artwork.
- Chenille Patches: Chenille patches have a distinct, textured appearance thanks to the use of yarn sewn onto a felt or fabric base, creating a 3D effect. Often associated with a vintage or retro aesthetic, these patches are perfect for adding a unique and tactile element to your design.
- PVC Patches: PVC patches are made from a soft, rubber-like material that’s durable, waterproof, and resistant to fading. Perfect for outdoor gear, bags, or items exposed to harsh elements.
- Leather Patches: Leather patches offer a classic, rustic charm and can be embossed, debossed, or printed on. They are perfect for designs that require a premium, high-end look.
- Bullion Patches: Bullion patches represent the epitome of luxury, created with metallic threads for an elegant, rich appearance. These high-end patches are typically used for military or formal insignia, badges, and crests.
7. Choose Complementary Colors
If you've ever studied art, you’re likely familiar with the color wheel—a tool that helps artists select complementary colors that work well together and create a balanced, harmonious effect in a design.
For a bold, eye-catching patch design, consider choosing complementary colors that are opposite each other on the color wheel. This contrast will make your design stand out. For a more subtle, cohesive look, opt for colors that sit next to each other on the wheel, creating a more unified and soft appearance.
If you're aiming to highlight smaller details in your design, use contrasting colors to make those elements pop. This will add dimension and make your patch more visually interesting.
8. Get Creative with the Size and Shape
At THE/STUDIO, we offer custom patches in any size and shape you can imagine. However, it's essential to consider where your customers will place your patch and how it will look on their chosen items.
While you may not always know exactly how or where your customers will use your patch, it’s helpful to have a general idea. For example, if your patches are intended for hats, a round patch might be the perfect fit for the front of a cap. Don't feel limited to basic shapes like rectangles or ovals—feel free to get creative with unique shapes that enhance your design. Just make sure the shape is both practical and visually appealing.
9. Choose the Right Manufacturer
Once your design concept is ready, it’s time to choose a manufacturer who can bring it to life. While ordering custom patches online is easy, it’s important to do your research and select a reputable manufacturer who can deliver high-quality results.
Look for customer reviews, request samples before committing to a full order, and ensure the manufacturer has experience creating custom patches. A trustworthy manufacturer will also be able to offer expert advice on design elements like color selection, patch size, and backing options. At THE/STUDIO, we have a team of experienced designers ready to assist you with any questions or concerns. With our low minimums, you can test your design with a small batch before placing a larger order.
Ready to Design Your Own Patch?
We hope these tips have inspired you to create the perfect custom patch design! If you're ready to start designing, head over to our website and begin the process today. Simply create an account, and you’ll be able to place an order using our easy and straightforward ordering system.
Once you’ve submitted your design, we’ll send you a sample to ensure everything looks just right before proceeding with your full order. And if you need any help along the way, don’t hesitate to reach out to our team of patch design experts. We're always here to assist you and ensure your custom patch turns out exactly as you envision!
FAQs
Can you turn a photo into a patch?
Yes! Our printed patches are perfect for transforming a photo or graphic into a custom patch design. Just upload the image you want to use along with any other design specifications, and we'll send you a sample before producing your full order to ensure everything is perfect.
How can I make my own patches at home?
Creating your own patches at home can be challenging, as it requires specialized equipment and materials. However, with THE/STUDIO’s easy-to-use online ordering system, you can create custom patches in just minutes and have them professionally produced and delivered right to your door.
What is the best fabric for patches?
The best fabric for your patch depends on your design and personal preference. We offer a variety of high-quality fabrics, including twill, nylon, vegan leather, and more. Our expert team is happy to help you choose the best fabric for your design to ensure you get the perfect custom patch.
How do I make my own embroidered patches?
To make embroidered patches, you'll need specialized equipment like an embroidery machine and digitizing software. If you don’t have access to these tools, don’t worry—THE/STUDIO has you covered! Our team uses state-of-the-art embroidery machines and the latest software to create high-quality embroidered patches. Simply upload your design, and we’ll handle the rest.